Skyrim Installation#
Quick Start#
Download and install the required mods using your mod manager.
Open the folder where your mod manager installed Mantella:
Mod Organizer 2 Users
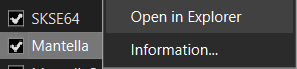
You can find your Mantella mod folder by right clicking the Mantella mod in the Mod Organizer 2 UI and selecting “Open in Explorer”:
Vortex Users
You can find your Mantella mod folder by going to
\Data\Mantellafrom your Skyrim game folder.
EgC:\Games\Steam\steamapps\common\Skyrim Special Edition\Data\Mantella.Create a free account with OpenRouter. Go to
Settings -> API Keysand generate a new key. Save the key value to theGPT_SECRET_KEY.txtfile in your Mantella folder found in step 2.Launch Skyrim. Mantella will open a window automatically when Skyrim is launched and will say
"Waiting for player to select an NPC..."when it is ready. When you start the game, the Mantella spell will be added to your inventory. Cast this spell on an NPC to start a conversation.
Note
By default, Mantella is configured to provide a balanced out-of-the-box experience. To learn how to prioritize real-time responses, see here.
Upgrading from a previous Mantella version
Make sure all Mantella conversations have ended in-game and save your game. Deactivate the previous Mantella version in your mod manager before activating the new version.
In case you missed it, FonixData File (Mod Manager Install) and Microsoft Visual C++ Redistributable 2015-2022 have recently been added as requirements.
From v0.12, Mantella stores conversation histories in your Documents/My Games/Mantella/Data/Skyrim/conversations/YourPlayerName1/ folder. This folder will generate for the first time after a conversation has been saved. Once generated, transfer your previous conversation histories (in your previous /Data/Skyrim/conversations/ folder) to this new folder.
If you get stuck anywhere in the installation process, please see Issues Q&A or reach out on Discord.
Requirements#
Skyrim#
Warning
As Mantella accesses and writes to files within your Skyrim folder, it is unlikely to work correctly if you have Skyrim stored in Program Files / (x86). Please ensure that you have Skyrim stored outside of this folder (eg C:\Games\Steam).
Steam does not allow you to create a new Steam Game Library on the same disk. You can either move the whole Steam client outside as described on this Steam Support page or use LostDragonist/steam-library-setup-tool to allow multiple Steam Game Libraries on one disk.
Required Skyrim Mods#
Warning
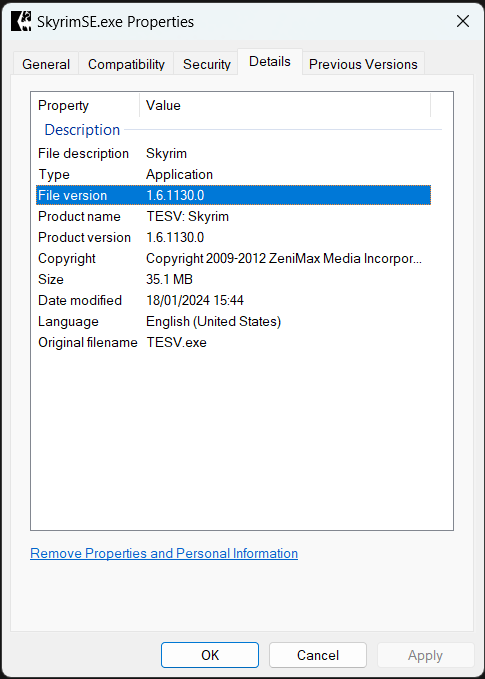
Always ensure you are downloading the right version of each mod for your version of Skyrim. This is the #1 reason for installation problems. You can check your Skyrim version by right-clicking its exe file in your Skyrim folder and going to Properties -> Details -> File version. VR users can just download the VR version of each mod if available, or SE if not.
Please follow the installation instructions on each of the linked pages:
Mod |
Notes |
|---|---|
Once installed by following the included readme.txt, run SKSE instead of the Skyrim exe. Note that there is a separate VR version of SKSE. |
|
VR Address Library for SKSEVR or Address Library for SKSE Plugins |
|
For lip sync generation. |
|
If using text input instead of mic. |
|
To access Mantella’s MCM. |
|
Optional Skyrim Mods#
These mods aren’t strictly necessary for Mantella to work, but they do greatly improve the experience.
Mod |
Notes |
|---|---|
Recommended so that Mantella voicelines are not interrupted by vanilla voicelines. |
|
Stops certain NPCs from turning hostile when you cast the Mantella spell on them. This mod requires the Unofficial Skyrim Special Edition Patch (USSEP). Mantella needs to be loaded after USSEP in your load order. |
Compatibility#
Some users have reported that Skyrim crashes when Mantella is used with Fuz Ro D’oh. A possible fix is to disable and re-enable Fuz Ro D’oh.
Mantella requires Windows 10 / 11 (it is yet unconfirmed whether it works on Windows 7).
Mantella needs to be loaded after the Unofficial Skyrim Special Edition Patch (USSEP) mod in your load order.
Usage#
Mantella UI#
The Mantella UI should open in your browser when the Mantella window starts, but if it does not, it can be accessed here: http://localhost:4999/ui/?__theme=dark.
Note
In order to access the Mantella UI, the Mantella window needs to be running.
MCM#
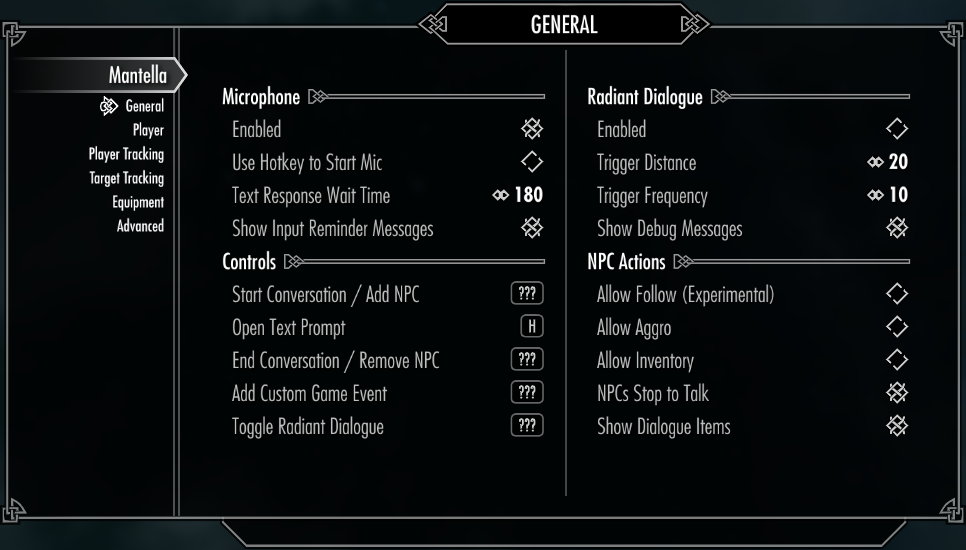
The Mantella MCM can be accessed in-game (SYSTEM -> MOD CONFIGURATION -> Mantella). Many options can be tweaked here, such as NPC actions and radiant conversations.
Conversations#
The Mantella spell & power should be added to your inventory under the Illusion category in the Magic menu once you install the mod. Conversations can be started by selecting an NPC with the spell, power, hotkey (enabled in the MCM menu), or via the in-game dialogue menu.
You can end a conversation by casting the Mantella End Conversation spell, or by simply saying / typing “goodbye” (recommended). NPCs will respond with “Safe travels” when conversations are ended via the latter method.
Once a conversation has started, you can add more NPCs to the conversation between each of your responses to start a group conversation:
Cast Mantella on NPC1 -> Say hi to NPC1 -> Cast Mantella on NPC2 -> Say hi to NPC1 & NPC2 etc
Alternatively, cast the Mantella spell without any NPC in your crosshair to start a group conversation with up to 5 NPCs nearby.
Radiant conversations can also be enabled in the MCM menu. These are conversations that are randomly started between idle NPCs. You can join the conversation by casting Mantella on either NPC. “NPCs can Approach Player” allows a random nearby NPC to apprach you to start a conversation.
Text Input#
Text input can be enabled by disabling mic input in Mantella’s MCM menu.
Restarting the Mantella window#
If for whatever reason the Mantella window crashes or gets stuck, you can restart it by going to Mantella MCM -> Advanced -> Restart Mantella.exe.
Actions#
Advanced Actions#
Advanced actions can be enabled in the Actions tab of the Mantella UI. Unlike basic actions, these actions allow LLMs to have greater control over how an action is triggered.
For example, when advanced actions are enabled, the MoveTo action allows the LLM to select which NPCs to move and where they should move. In contrast, the basic version of MoveTo only allows a single NPC to move to the player.
Disabled Actions#
Not all actions are enabled by default - see the Actions tab of the Mantella UI to see which actions are disabled. The more actions that are enabled, the more LLMs will struggle to manage the number of actions, so ideally only the actions you are interested in should be enabled.
Some actions are experimental, and may cause bugs over long playthroughs. For full details on each action, see the <mod_folder>\Mantella\SKSE\Plugins\MantellaSoftware\data\actions\ folder.
Commands#
If you struggling to get an NPC to perform an action on their own, you can force these actions to occur by simply saying / typing the action you want to occur (eg “follow”, “inventory”, etc).
Saved Data#
When a conversation ends, a summary of the conversation is saved to a local text file for each NPC in the conversation. These summaries are then loaded the next time an NPC is spoken with. You can view / edit these summaries in your My Games/Mantella/data/Skyrim/conversations/YourPlayerName1/ folder.
Services#
While the quick start guide is the fastest way to get set up, Mantella can be heavily tweaked to your liking and can connect to a variety of different services.
Language Models (LLMs)#
LLMs power the creation of responses by NPCs. There are a number of different LLMs to choose from, ranging from free local models to large externally hosted models.
Note
Some smaller models may struggle to handle long term conversations and memory summarising.
If you have already followed the quick start guide you will have an OpenRouter account set up with Gemma 4 26B A4B (free). You can select from a variety of other LLMs hosted on OpenRouter (both free and paid) via the Model option in the Large Language Model tab of the Mantella UI.
If you would prefer to use a different service, or host your own LLM locally, see the options below:
API Models#
OpenAI
Copy your OpenAI secret API key (see here if you need help finding it (you will need to set up an account if you haven’t already)) and paste into your GPT_SECRET_KEY.txt file (see the quick start guide to learn where GPT_SECRET_KEY.txt is stored). Note that you will need to set up your payment details for the API to work.
Once completed, in the LLM Service dropdown of the Large Language Model tab of the Mantella UI select “OpenAI”. Update the list of model options in the Model setting and select an OpenAI model.
Local Models#
koboldcpp
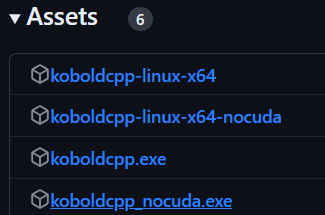
Install koboldcpp’s latest release from here. If you want to run koboldcpp on your CPU or otherwise do not have an NVIDIA GPU, download
koboldcpp_nocuda.exeunder “Assets”. If you have an NVIDIA GPU with CUDA support, downloadkoboldcpp.exeunder “Assets”.
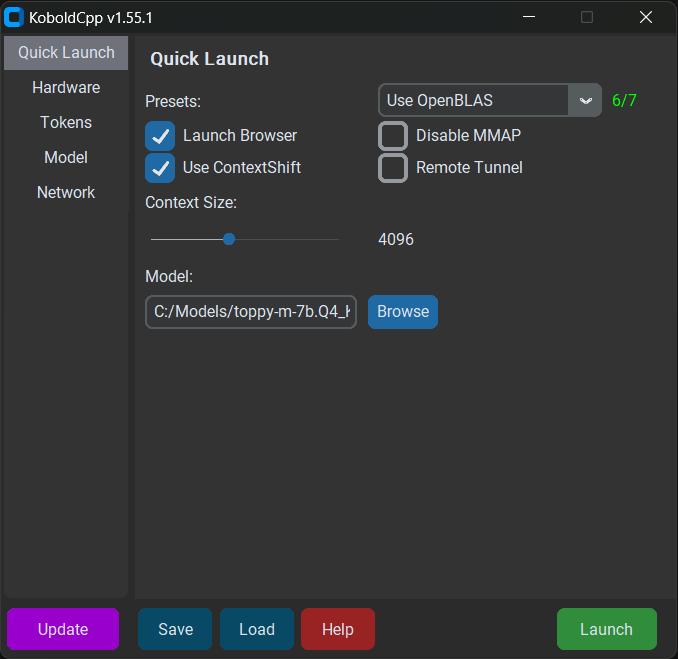
Download a local model, such as
Gemma 4 E4Bfrom here.Run koboldcpp.exe. Click the “Browse” button next to the “Model” field and select the model you downloaded. Click “Launch” in the bottom right corner.
In the
LLM Servicedropdown of theLarge Language Modeltab of the Mantella UI select “KoboldCpp”.
Note
Make sure koboldcpp is running when Mantella is running!
text-generation-webui
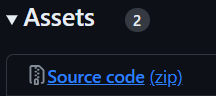
Install the latest text-generation-webui .zip from here.
Place a local model into the
text-generation-webui\modelsfolder (to get started, you can downloadtoppy-m-7b.Q4_K_S.gguffrom here).

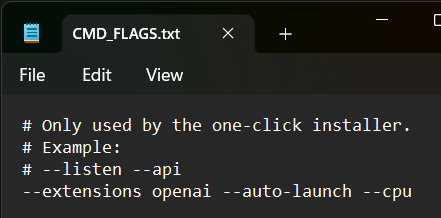
Paste the text “–extensions openai –auto-launch” (as well as “–cpu” for CPU users) into the installed folder’s CMD_FLAGS.txt file.
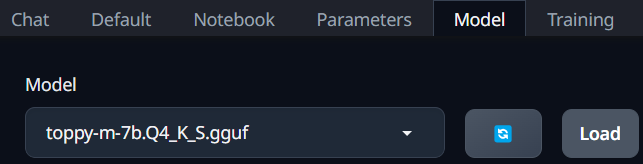
Start text-generation-webui and wait for the UI to open in your web browser. Navigate to the “Model” tab, select your model from the drop-down list, and click “Load”.
In the
LLM Servicedropdown of theLarge Language Modeltab of the Mantella UI select “textgenwebui”.
Note
Make sure text-generation-webui is running when Mantella is running!
LM Studio
Download and install LM Studio from here.
Open LM Studio and download an LLM model.
Go to the Developer tab, and in the drop-down at the top of the page select your model. If a Windows Firewall message pops up click Allow. Click the Start Server button.
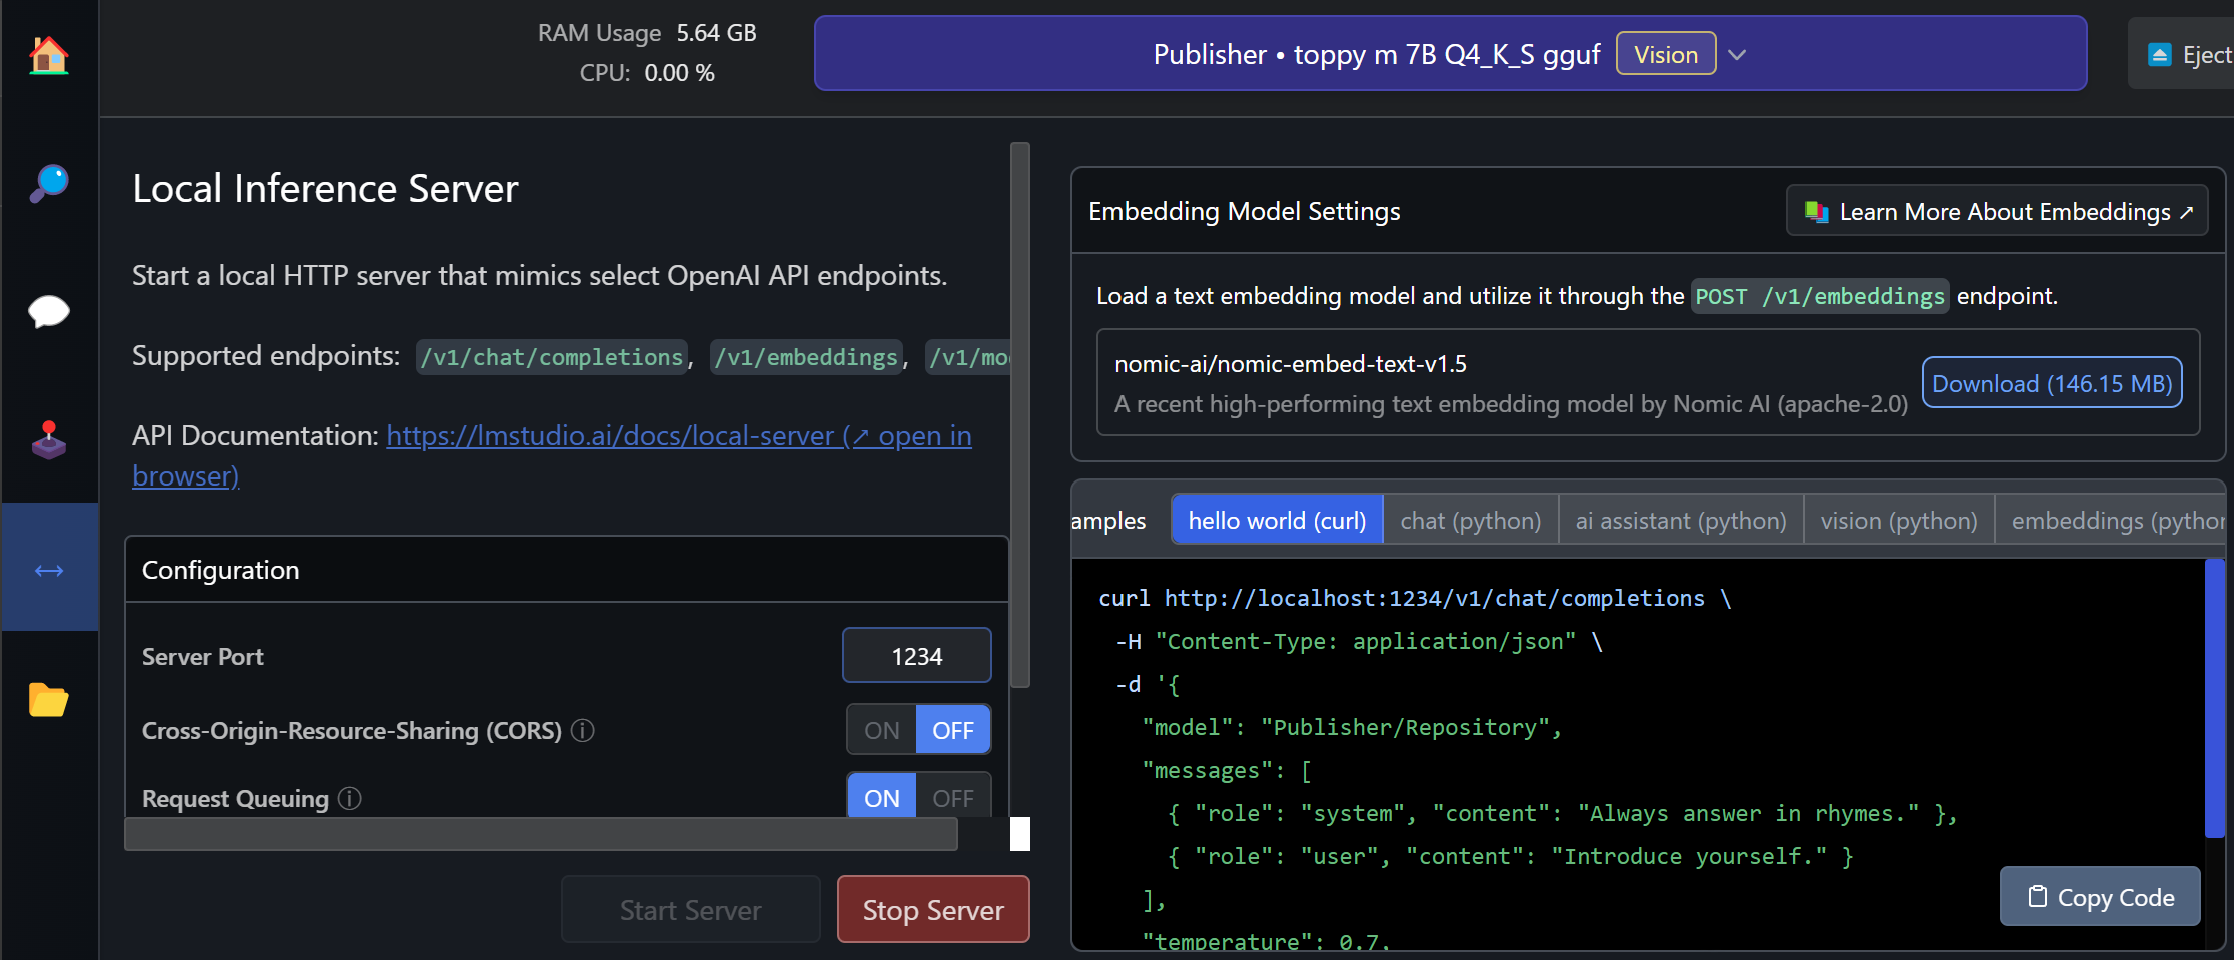
In the
LLM Servicetext box of theLarge Language Modeltab of the Mantella UI, set the value tohttp://localhost:1234/v1/(ignoring the options in the drop down list). This is the URL that LM Studio is running your model on. TheModelsetting can be ignored as this has already been selected in step 2. If everything works correctly, you should see a message display in Mantella.exe saying “Running Mantella with local language model” when you start it.
Note
Make sure LM Studio is running when Mantella is running!
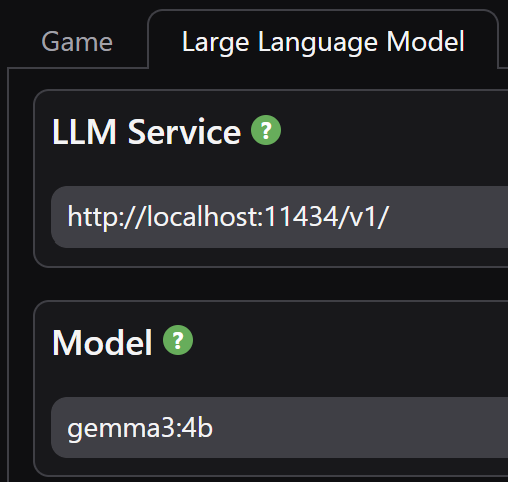
Ollama
Download and install Ollama from here. Ollama should start running in your taskbar icons tray. If it doesn’t, search for the installed application and open it.
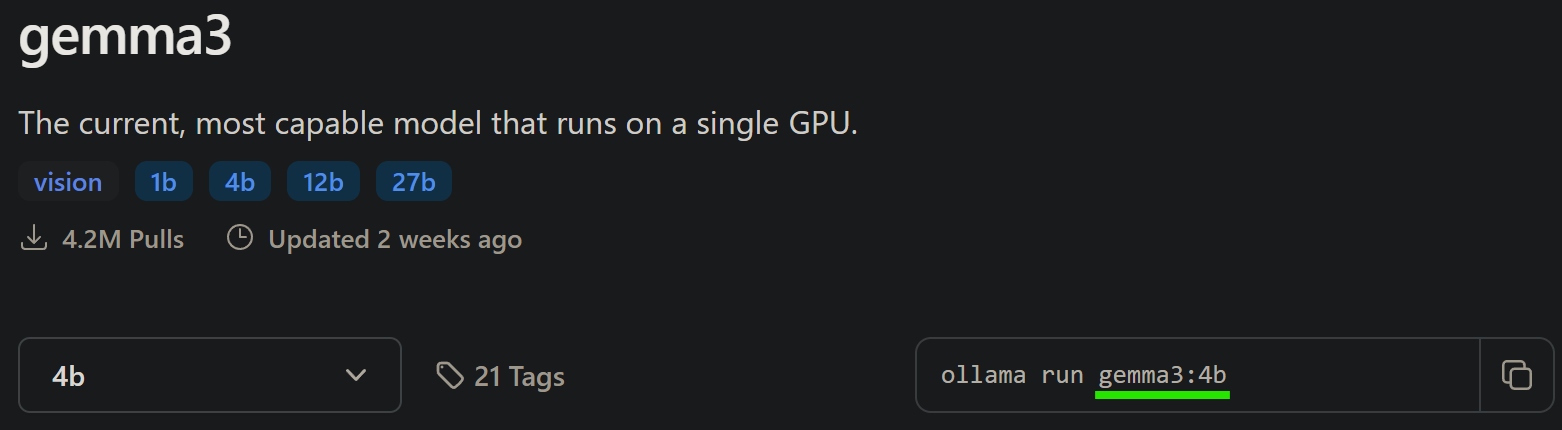
Search for a model you would like to use from Ollama’s library. For example, Gemma 3 4B. Take note of the model ID displayed on the page (eg
gemma3:4b).
Open Command Prompt (Windows key + search “cmd”) and run
ollama pull <model ID>to download the selected model (egollama pull gemma3:4b).In the
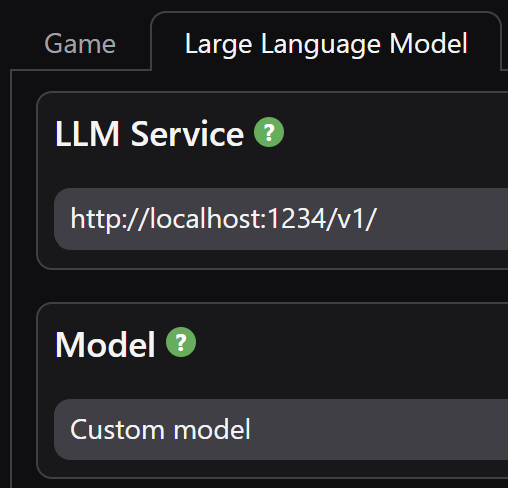
LLM Servicetext box of theLarge Language Modeltab of the Mantella UI, set the value tohttp://localhost:11434/v1/(ignoring the options in the drop down list). This is the URL that Ollama is running on. SetLarge Language Model->Modelto the model ID from step 2 (eggemma3:4b). If everything works correctly, you should see a message display in Mantella.exe saying “Running Mantella with local language model” when you start it.
Note
Make sure Ollama is running when Mantella is running!
Other LLM Services#
Mantella supports all language model services with an OpenAI-compatible API. You can connect to any OpenAI-API-compatible service by following these steps:
Paste the OpenAI-API-compatible URL of the service into the
LLM Servicetextbox of theLarge Language Modeltab in the Mantella UI. These URLs typically end with/v1.(Only needed for non-local services) Paste the name of a given model of the service into the
Modeltextbox of theLarge Language Modeltab.(Only needed for non-local services) Paste a secret key to connect to the service in your
GPT_SECRET_KEY.txtfile (see the quick start guide to learn whereGPT_SECRET_KEY.txtis stored).
Other Known Services:
Service |
URL |
Models List |
|---|---|---|
Alibaba |
https://dashscope-intl.aliyuncs.com/compatible-mode/v1 |
https://www.alibabacloud.com/help/en/model-studio/getting-started/models |
Cerebras |
https://api.cerebras.ai/v1 |
|
https://generativelanguage.googleapis.com/v1beta/openai/ |
||
Groq |
https://api.groq.com/openai/v1 |
Vision#
LLM vision can be enabled in the Vision tab of the Mantella UI. If the selected model in the Large Language Model tab has vision capabilities (or if a separate vision model has been selected in the Vision tab), a screenshot of your game window will be passed to the model every time you respond to an NPC. Please see the documentation of your selected LLM provider to find out which models support vision. For OpenRouter models, the full list can be found here.
Vision capabilities can also be run locally via koboldcpp. To get started, download the required mmproj file for your local LLM. In the koboldcpp launch window, under the Loaaded Files tab, set the path to your mmproj file via the Mmproj File setting. When koboldcpp is launched, and vision is enabled in the Mantella UI, your local LLM will support vision.
Text-to-Speech#
By default, Mantella comes packaged with a fast and local TTS service called Piper (note: Piper only supports English). Mantella can also be run with xVASynth (local) or XTTS (local / online) to generate NPC voicelines. See the comparison below for more details:
Feature |
Piper |
xVASynth |
XTTS |
|---|---|---|---|
Fastest |
✔* |
||
Easiest setup |
✔ |
||
Highest quality |
✔ |
||
Greatest emotional range |
✔ |
||
Support for modded NPCs |
✔ |
✔ |
|
Easy to create custom voice models |
✔ |
||
Local support |
✔ |
✔ |
✔ |
API support |
✔ |
||
Can run on a second PC |
✔ |
*XTTS may generate faster responses when running externally.
xVASynth
Download xVASynth via Steam (preferred) or Nexus. Do not store xVASynth in your Skyrim folder.
Download the Skyrim voice models. You can either download all models via a torrent, via the xVASynth UI if you have Nexus Premium, or manually via the Nexus Mods page:
xVASynth Model Installation Options
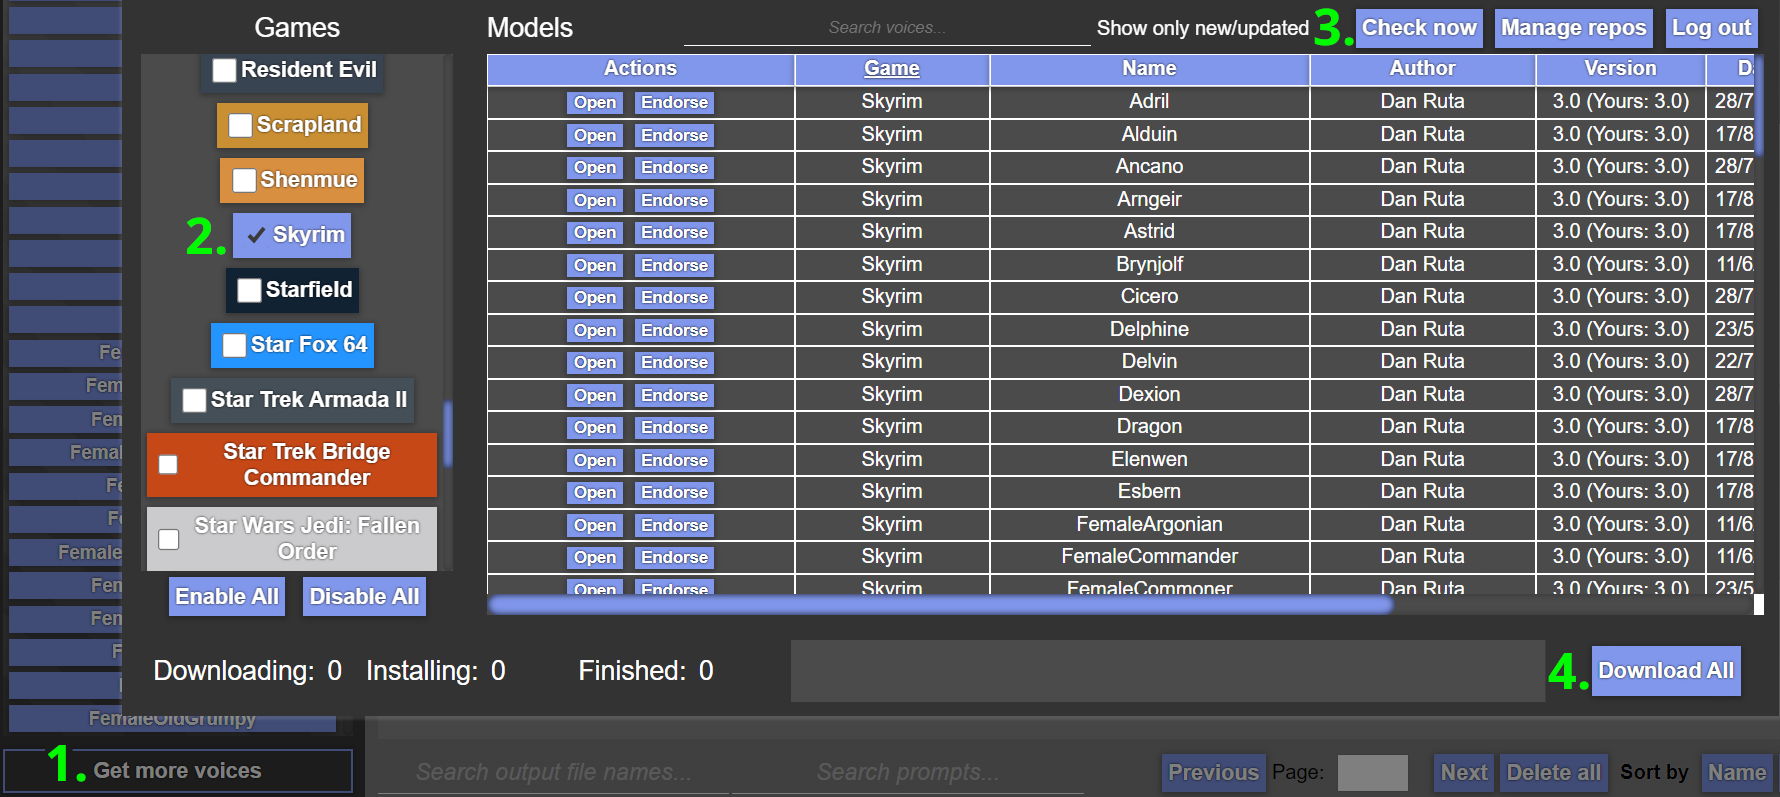
💎 Nexus Premium (Quickest)
If you are subscribed to Nexus Premium, (1.) open the xVASynth UI and select “Get More Voices” from the bottom left corner. (2.) Unselect all games except for Skyrim, (3.) click “Check now” (you will be prompted to login to Nexus), then (4.) “Download All”.
Note
You may need to restart the download a few times for all voice models to properly download.
Warning
If the first voice model never finishes installing. See if the game folder exists within
resources/app/models. If it is not there, create it and retry. As this is a known bug of xVASynth: https://github.com/DanRuta/xVA-Synth/issues/59🌊 Torrent (Slowest, Easiest)
Voice models can be downloaded via a single torrent. Torrents can be downloaded via Bittorent clients such as qBittorent. Note that download speeds vary depending on the time of day. Paste the below magnet link in your browser to receive a popup to open it via your Bittorent client, and set the download location to your_xVASynth_folder/resources/app/models/skyrim:
magnet:?xt=urn:btih:798BB3190E776BFDCF590910C0805656420F45BC&dn=skyrim&tr=udp%3a%2f%2ftracker.opentrackr.org%3a1337&tr=udp%3a%2f%2fexplodie.org%3a6969&tr=wss%3a%2f%2ftracker.btorrent.xyz&tr=wss%3a%2f%2ftracker.openwebtorrent.comNote
This magnet URI may be removed from this page if any voice model becomes unavailable on Nexus Mods.
🛠️ Manual (Hardest)
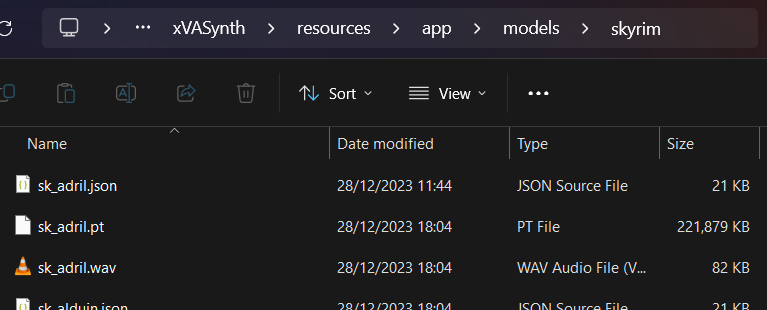
If you do not have Nexus Premium, or if the torrent is not available, you can also download the voice models directly from Nexus here (under “Optional”, not “Old”). Once you have manually downloaded each voice model into a folder, unzip the models manually into the correct xVASynth folder (
xVASynth\resources\app\models\skyrim). Once the extraction is complete, you can delete the zipped voice model files.
The contents ofxVASynth\resources\app\models\skyrimshould look like the below:
Note
If downloading all models sounds a bit daunting, you can start with the “Male Nord” and “Male Soldier” voice models to at least allow talking to Skyrim guards.
(Optional) Download the xVASynth DeepMoji Plugin here. It boosts the emotionality of xVASynth voice models to make them sound less robotic (only available in English).
Select xVASynth in the Text-to-Speech tab of the Mantella UI and set the path to your xVASynth folder.
XTTS
Local
Warning
The Mantella XTTS exe is currently incompatible with NVIDIA 5000 series GPUs. The server instead needs to be started by following the instructions here.
Download MrHaurrus’s XTTS API server from here and unzip it.
Download the voice models (latents) folder for your desired language. Extract this folder into the same folder as
xtts-api-server-mantella.exeabove. In other words, you should have a folder calledlatent_speaker_folderin your XTTS folder.Select XTTS in the
Text-to-Speechtab of the Mantella UI and set the path to your XTTS folder.Install required lip sync files as instructed in
Text-to-Speech->LipGenerator Foldersetting in the Mantella UI and set the path to these files.(Optional) If you are using an NVIDIA GPU, the
XTTS DeepSpeedsetting can improve response times by 2-4x if you also haveXTTS Deviceset to “cuda”.
External (from $0.14/hr)
Make a RunPod account (https://www.runpod.io/) and add some credits ($10 minimum).
Follow this link to open the Mantella XTTS Pod. Choose a GPU to run the Pod with (if in doubt, choose the cheapest). Note that cheaper GPUs are available if you change the “Secure Cloud” setting to “Community Cloud”.
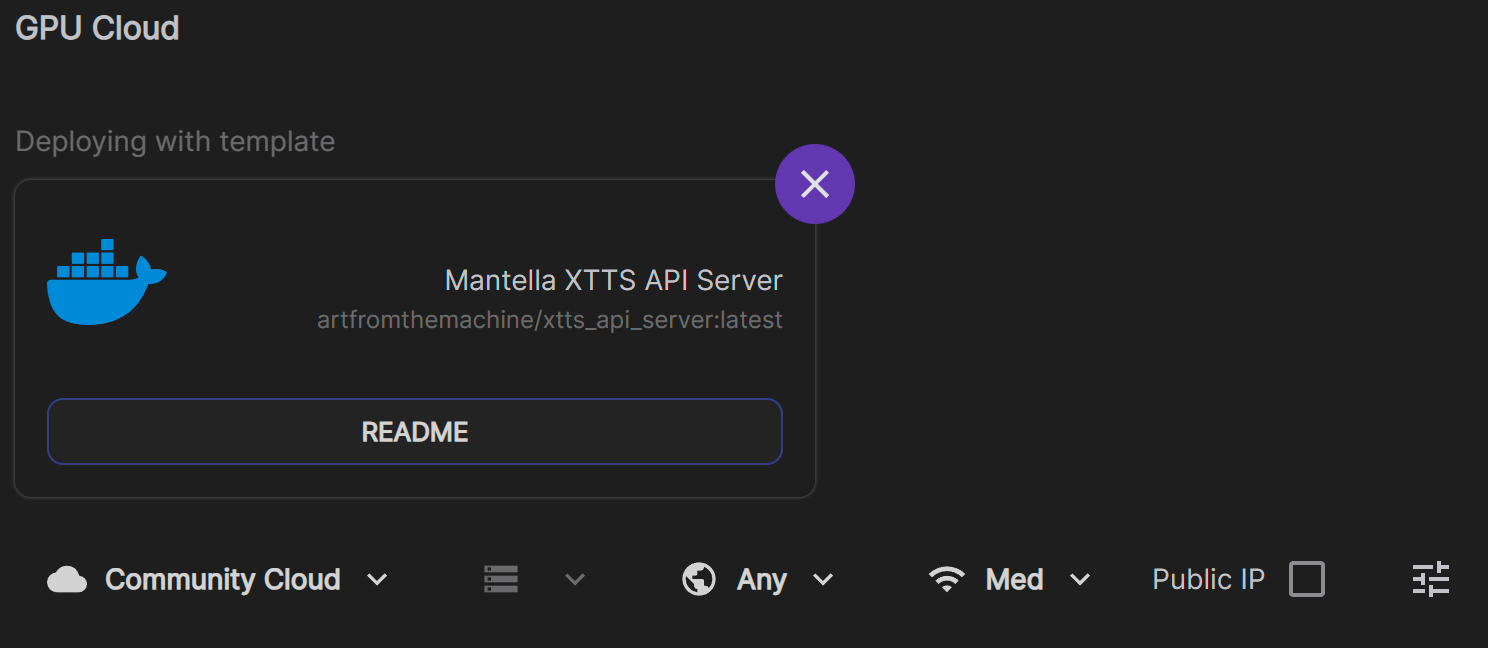
On the following two pages just click “Continue” and “Deploy” (you don’t need to change any settings here).
Once the Pod is running, select XTTS in the Text-to-Speech tab of the Mantella UI and set
XTTS URLtohttps://{pod_id}-8020.proxy.runpod.net/, with {pod-id} being the ID of the running Pod. Eghttps://a1b2c3d4qwerty-8020.proxy.runpod.net/.

It takes a few minutes for the Pod to start up, you can check the progress in Logs -> Container Logs from the Pod’s dropdown menu. It will say “Uvicorn running” when it is ready.
When you are finished using Mantella, make sure to delete the Pod so that you are no longer charged! It only takes a few clicks to set up a new Pod so don’t feel guilty about deleting it.
Speech-to-Text#
By default, Mantella comes packaged with a fast and local speech-to-text (STT) service called Moonshine (note: Moonshine only supports English). Mantella can also be run with another STT service called Whisper (see supported languages), either locally or via an API.
Whisper#
Whisper can be enabled by selecting the service from the STT Service dropdown of the Speech-to-Text tab via the Mantella UI. By default, Whisper will automatically install and run locally on your CPU, but can also be run on your GPU or run via an API.
Run Whisper on your GPU
To use GPU / CUDA mode with Whisper, some extra files are required, see Faster Whisper documentation. Note that cuBLAS may already be part of the CUDA Toolkit, so you may only require the cudnn_###_infer64_8.dll files to be beside the Mantella executable. Afterwards select “cuda” from the Whisper Process Device dropdown of the Speech-to-Text tab via the Mantella UI.
Run Whisper via an API
See the Whisper Service setting of the Speech-to-Text tab in the Mantella UI for details on how to connect to an external Whsiper service.
Running Local Services from a Second PC#
To run local LLMs / Whisper / XTTS / etc on a second PC on the same network, you will need to edit the URL used to connect to the service on your primary PC.
You first need to find out the URL of the service when run locally. If the service you would like to connect to is not listed below, please search for it in the service’s documentation or reach out on Discord.
Note
For LLM services, you need to find the URL of the service’s OpenAI-compatible endpoint (which typically ends in “/v1”).
Service |
URL |
|---|---|
KoboldCpp |
|
text-generation-webui |
|
LM Studio |
|
Ollama |
|
To find out the URL the service is running on when connecting to a second PC, follow the steps below:
Open a Command Prompt window (Windows key + search for “cmd”).
Type
ipconfigand hit enter.Near the bottom of the listed results, you should see an “IPv4 Address” entry (eg
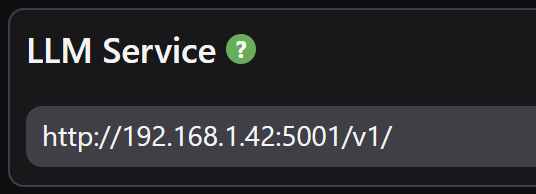
192.168.1.42). Note the value of this entry.For the service you would like to connect to, replace the “localhost” part of the URL with the address from step 3 (eg
http://192.168.1.42:5001/v1/for KoboldCpp).Paste the new URL into the appropriate service setting (eg
Large Language Model->LLM Service,Text-to-Speech->XTTS URL,Speech-to-Text->Whisper Service, etc) in the Mantella UI like in the example image below: